Import Data
Article Type: Configuration / How-To Audience: App Admins, Application Designers, Partners Module: Data Management Applies to Versions: All Versions Estimated Time: 15-30 minutes per data model
1. Overview
The Import Data feature enables bulk loading of records into Fuuz data models using CSV files. This tool generates data model-specific templates showing all available fields with their data types, allowing users to prepare import files with the correct structure. Import Data is essential for migrating data from external systems, performing initial data loads during application setup, or bulk creating records for master data and transactional data during cutover processes.
Note: Before You Begin — Import Data creates new records only. To update or upsert existing records, you must create a custom integration flow that accepts file uploads. Always test imports with 5-10 sample rows before processing your entire dataset.
Important: Be aware of data model triggers and subscriptions. Request-response workflow triggers will NOT fire on import, but data change subscriptions (event-driven functions) WILL be triggered for each imported record.
2. Prerequisites
- Access Level: App Admin access type, or Web Access with custom RBAC policies
- Permissions: Create permissions on the target data model
- Resources: CSV file prepared with UTF-8 encoding, recommended maximum 1,000 rows per file
- Knowledge: Understanding of data model schema including field names, data types, and relationships
- Related Records: For imports with relationship fields, parent/related records must exist first with known IDs
3. Procedure Steps
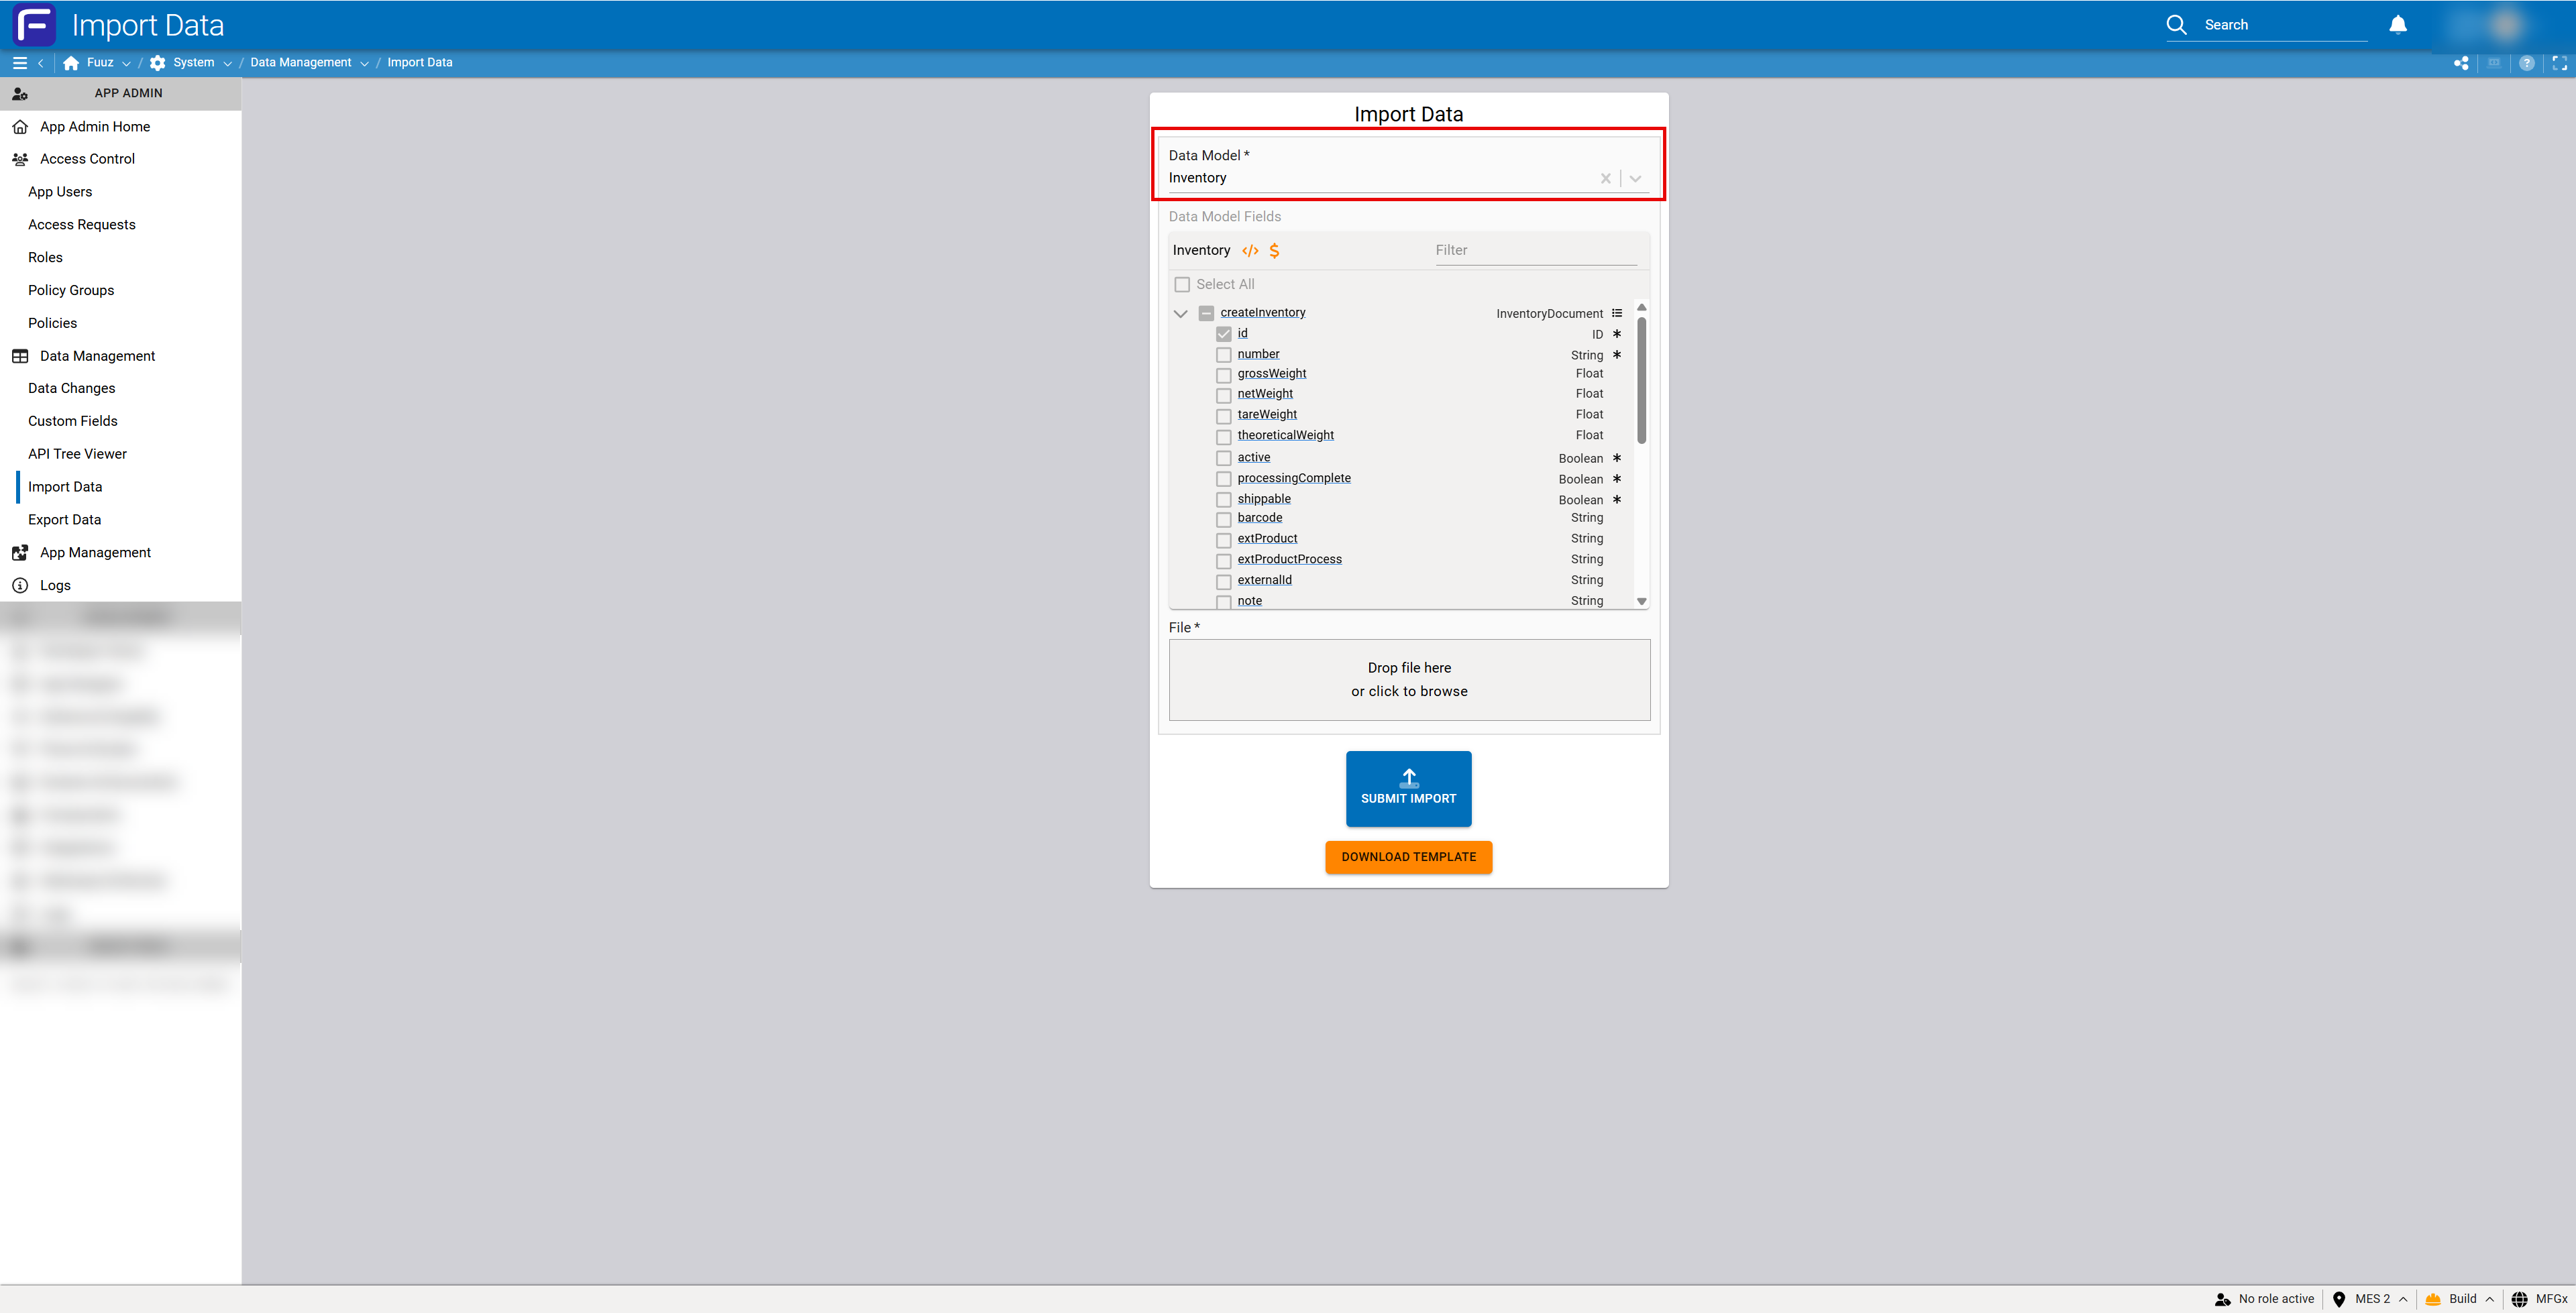
Step 1: Select Data Model and Review Fields
Open the Import Data screen from the Data Management menu and select your target data model to view its field structure.
- Open Import Data from the Data Management menu
- Click the Data Model dropdown and select your target model (e.g., Inventory, Asset, WorkOrder)
- Review the displayed field list in the "Data Model Fields" section
- Note the Base Model name displayed above the field list for context
- Use the Filter textbox to search for specific fields if needed (view-only, does not affect template)
- Review field data types shown in the right column (String, Float, Boolean, etc.)
- Identify required fields (marked with asterisks) that must be included in your import
- Identify relationship fields that require IDs of related records
Note: All fields displayed are read-only for reference purposes. Checkboxes are disabled and cannot be selected. The field viewer shows all importable fields including custom fields, but excludes system metadata fields (
_trace,_metadata).
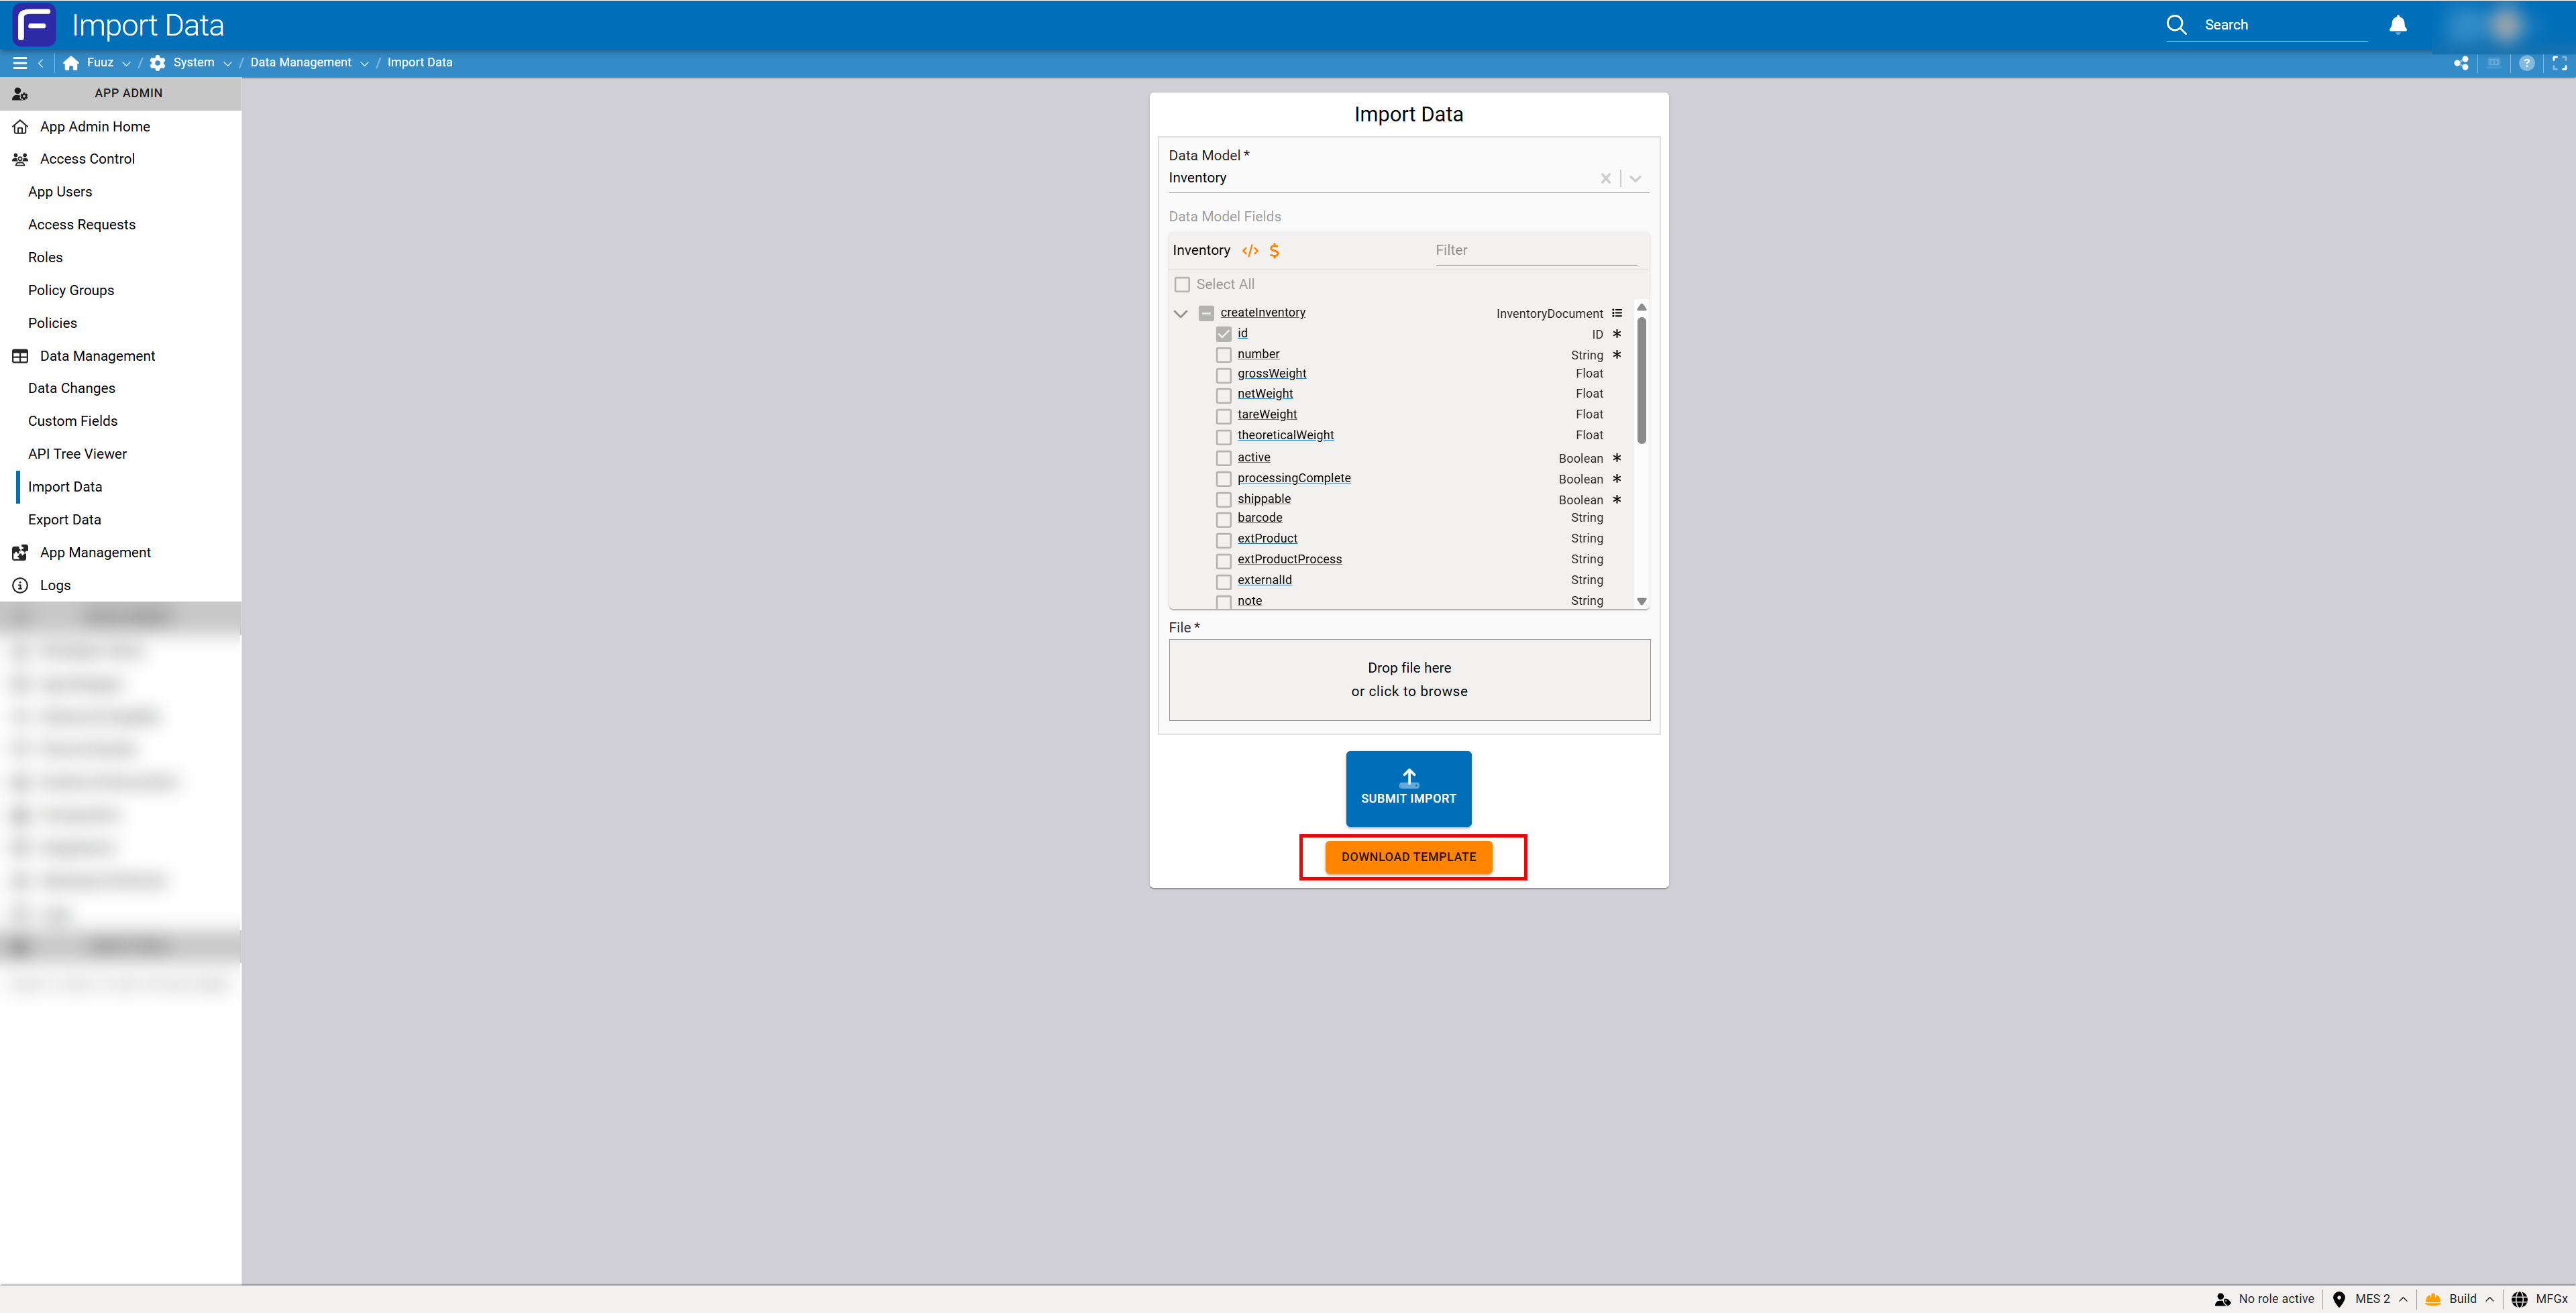
Step 2: Download CSV Template
Generate and download the data model-specific CSV template.
- Click the DOWNLOAD TEMPLATE button (orange button at bottom of form)
- Save the generated CSV file to your local system
- Open the CSV file in a text editor or spreadsheet application
- Verify the template structure:
- Row 1: Field names exactly as defined in Schema Designer
- Row 2: Data types for each field
- Row 3+: Empty rows for your data
Important: The template does NOT include example data or instructions. You are responsible for understanding your data model's requirements and preparing correctly formatted data based on the field types shown in row 2.
Step 3: Prepare Your Import Data
Populate the CSV template with your data following formatting requirements for each field type.
- Keep row 1 (headers) and row 2 (data types) unchanged
- Start entering data in row 3 and below
- Format field values according to data type requirements (see Configuration Reference section below)
- For relationship fields, enter the ID of the related record
- Leave empty cells for null values (do not enter "null" as text)
- Ensure all required fields have values for every row
- Remove any extra formatting (colors, formulas, comments) from the CSV
- Save the file as CSV with UTF-8 encoding
- Limit file size to approximately 1,000 rows to prevent data loss over network
Step 4: Handle Relationship Fields and IDs
For data models with relationships, plan your import sequence carefully.
- Import parent/related records first before importing child records that reference them
- Determine ID assignment strategy:
- Fuuz-Generated CUIDs: Let Fuuz auto-generate IDs (requires retrieving IDs after creation for subsequent imports)
- Custom IDs: Assign your own unique IDs during import (simpler for multi-level imports)
- For setup/configuration models, consider using
id = labelpattern to simplify referencing - Example multi-level import sequence for manufacturing:
- Step 1: Import raw materials (assign custom IDs)
- Step 2: Import sub-assemblies (reference raw material IDs)
- Step 3: Import finished products (reference sub-assembly IDs)
- Step 4: Import BOMs and routings (reference product IDs)
- Ensure all referenced IDs exist before import; missing IDs cause validation failure
Important: Currently, only IDs can be used to establish relationships. Alternative identifiers (names, codes) are not supported for linking records during import. Use care when assigning custom IDs to ensure uniqueness within each data model collection.
Step 5: Submit Import for Processing
Upload your prepared CSV file and submit the import job.
- Return to the Import Data screen in the Data Management menu
- Select the same data model used for template generation
- In the File section, either:
- Drag and drop your CSV file into the upload area, or
- Click "click to browse" to select your file
- Review the file name displayed to confirm correct file selection
- Click the SUBMIT IMPORT button (blue button)
- Wait for validation to complete
- Review the import summary or error log displayed
Note: Import processing is asynchronous. You can navigate away from the page or process multiple imports simultaneously. Typical imports complete in a few seconds for small files, up to one minute for very large files (10,000+ records).
4. Configuration Reference
Field Type Formatting Requirements
| Field Type | Format Requirements | Example |
|---|---|---|
| String (Text) | Plain text, no character limits. No special escaping required unless field contains commas. | Product Description |
| Boolean | Use lowercase: true or false only. Case-sensitive. |
true |
| Integer | Whole numbers only, no decimal points. Can be negative. | 42 |
| Float (Decimal) | Decimal numbers, no precision restrictions. Use period as decimal separator. | 123.45 |
| Date | Format depends on application settings. Check App Settings for configured date format. | 2024-12-26 |
| Date & Time | Timezone handled by application settings. Include date and time components. | 2024-12-26 14:30:00 |
| Markdown | Markdown-formatted text. Enclose in quotes if contains commas or line breaks. | "# Title\n\nBold" |
| Reference (ID) | Must be exact ID of existing related record. String or CUID format depending on model configuration. | clzze4qeq0000by8... |
| Null Values | Leave cell empty. Do not enter the text "null" or "NULL". | (empty cell) |
CSV File Requirements
- File Format: CSV (Comma-Separated Values) only
- Character Encoding: UTF-8 required
- Recommended Row Limit: ~1,000 rows per file to prevent network data loss
- Maximum Row Limit: Up to 10,000 rows supported (processing time increases significantly)
- File Naming: Any name is acceptable; use descriptive names for tracking
- Special Characters: Fields containing commas must be enclosed in double quotes
- No Formatting: Remove all Excel formatting (colors, formulas, comments) before saving as CSV
- Header Rows: Row 1 (field names) and Row 2 (data types) must remain unchanged from template
5. Validation & Testing
Validation Process:
- Pre-Import Validation: Upon file upload, the system validates:
- File format is valid CSV
- Header row matches expected field names
- Required fields are present and populated
- Data types match field definitions
- Boolean values use correct case (lowercase true/false)
- Referenced IDs exist in related data models
- Unique constraints are satisfied
- Error Handling: If any row fails validation, the entire import fails
- Error Log: System provides detailed error log showing:
- Row numbers with errors
- Field names causing errors
- Specific validation failure messages
- Correction Process: Fix identified errors in CSV file and resubmit entire import
Testing Best Practice:
- ✓ Always test with 5-10 sample rows before importing full dataset
- ✓ Verify all required fields are populated in test data
- ✓ Test one representative row from each data category or type
- ✓ Verify relationship references work correctly with test IDs
- ✓ Check imported records using API Tree Viewer or relevant screens
- ✓ Delete test records before importing production data
Success Verification:
- Import Summary: Review success message showing number of records created
- Data Model Summary: Open the Data Models list in the Developer menu to verify record count increased
- API Tree Viewer: Use the API Tree Viewer in the Data Management menu for real-time validation of imported records
- Application Screens: Navigate to relevant screens to view imported data in context
- Data Change Records: If data change tracking is enabled, verify change records were created for import
6. Troubleshooting
Excel to CSV Formatting Issues
Symptom: Import fails with formatting or data type errors after saving from Excel.
Cause: Excel adds extra formatting, formulas, or incorrect encoding when saving to CSV.
Resolution:
- Before saving as CSV, remove all:
- Cell colors and highlighting
- Formulas (convert to values)
- Comments and notes
- Data validation rules
- Save using "CSV UTF-8 (Comma delimited)" format, not "CSV (Comma delimited)"
- Open saved CSV in a text editor to verify clean formatting
- Consider using a CSV editor or text editor instead of Excel for final preparation
Boolean Case Sensitivity Error
Symptom: Import fails on boolean fields with "False" or "TRUE" values.
Cause: Boolean values are case-sensitive and must be lowercase.
Resolution:
- Change all boolean values to lowercase
trueorfalse - Use find/replace to change "True" to "true" and "False" to "false"
- Verify all boolean columns use consistent lowercase format
- Resubmit import
Referenced ID Not Found
Symptom: Import fails with error indicating relationship field references non-existent ID.
Cause: Related record does not exist, or ID is incorrect/misspelled.
Resolution:
- Verify parent/related records exist before importing child records
- Use API Tree Viewer to verify exact ID of related record
- Check for typos or extra spaces in ID field
- If using custom IDs, ensure they were created exactly as specified in earlier import
- Import related records first if they don't exist yet
- Correct IDs in CSV file and resubmit
Missing Required Field
Symptom: Import fails indicating required field is null or missing.
Cause: Required field has empty value or column is missing from CSV.
Resolution:
- Review error log to identify which field(s) are required
- Check field list in Import Data screen to identify required fields (marked with asterisks)
- Ensure required field columns are present in CSV
- Populate all required fields with valid values for every row
- Verify column headers match exactly with template
- Resubmit import
Data Type Mismatch
Symptom: Import fails with data type validation errors.
Cause: Field values don't match expected data type.
Resolution:
- Review row 2 of template showing data types for each field
- Check error log to identify specific fields with type mismatches
- Common issues:
- Text in integer/float fields
- Incorrect date format
- Decimal point in integer field
- Boolean values not lowercase
- Correct data formatting according to Configuration Reference section
- Resubmit import
Unique Constraint Violation
Symptom: Import fails indicating duplicate value for unique field.
Cause: Value in unique field already exists in database or appears multiple times in import file.
Resolution:
- Identify unique fields in data model (marked in field list)
- Check for duplicate values within import file:
- Use Excel's "Remove Duplicates" feature
- Sort by unique field to spot duplicates visually
- Check if values already exist in database using API Tree Viewer
- Either:
- Remove duplicate rows from import file, or
- Change values to ensure uniqueness
- If updating existing records, use custom integration flow instead of Import Data feature
Missing Column Headers or Incorrect Column Order
Symptom: Import fails immediately with header validation error.
Cause: CSV headers don't match template, columns deleted, or column order changed.
Resolution:
- Download fresh template from Import Data screen
- Compare headers in your file with template headers
- Ensure row 1 (headers) and row 2 (data types) are unchanged
- Do not delete columns - leave empty if not using specific fields
- Do not reorder columns from template
- Copy your data to fresh template if necessary
7. Related Resources
Advanced Import Scenarios
For advanced import requirements beyond the standard Import Data feature, create custom integration flows that support:
- Updating existing records (upsert capability)
- Multiple file formats (Excel, XML, JSON)
- Nested data structures and complex relationships
- Custom validation logic
- Data transformation during import
- Alternative identifier matching (name, code vs. ID)
- Batch processing with partial success handling
8. Revision History
| Version | Date | Editor | Description |
|---|---|---|---|
| 1.0 | 2024-12-26 | Fuuz Documentation Team | Initial Release |
See Also
Related Articles
Data Management Overview
Article Type: Concept Audience: Application Administrators, Enterprise Administrators Module: Fuuz Platform - Data Management Applies to Versions: 2024.12+ 1. Overview Data Management provides Application Administrators and Enterprise Administrators ...Export Data
Article Type: How-To / Feature Guide Audience: End Users, Administrators Module: Fuuz Platform Applies to Versions: 2025.5+ Overview The Export Data feature was introduced in the Fuuz 2025.5 release. It provides an easy way to export data from Fuuz ...Data Change History
Article Type: How-To / Reference Audience: Application Administrators, Developers, Compliance Officers Module: Fuuz Platform - Data Management Applies to Versions: 2024.12+ 1. Overview Data Change History provides comprehensive field-level audit ...API Tree Browser
Article Type: Concept Audience: App Admins, Developers, Power Users Module: Data Management Applies to Versions: All Versions 1. Overview The API Tree Browser is a powerful visualization tool that provides real-time access to data stored in both ...Data Model Custom Fields
Article Type: Concept Audience: App Admins, Application Designers, Partners Module: Data Management Applies to Versions: All Versions 1. Overview Data Model Custom Fields allow App Admins and authorized users to extend any data model in the Fuuz ...