Export Data
Article Type: How-To / Feature Guide Audience: End Users, Administrators Module: Fuuz Platform Applies to Versions: 2025.5+
Overview
The Export Data feature was introduced in the Fuuz 2025.5 release. It provides an easy way to export data from Fuuz into different formats. Supported formats include CSV and JSON. Exports can be ad hoc or based on reusable Export Configurations.
Important: As of 2025.5, files are not automatically deleted. A future release will purge files older than 30 days.
Navigation
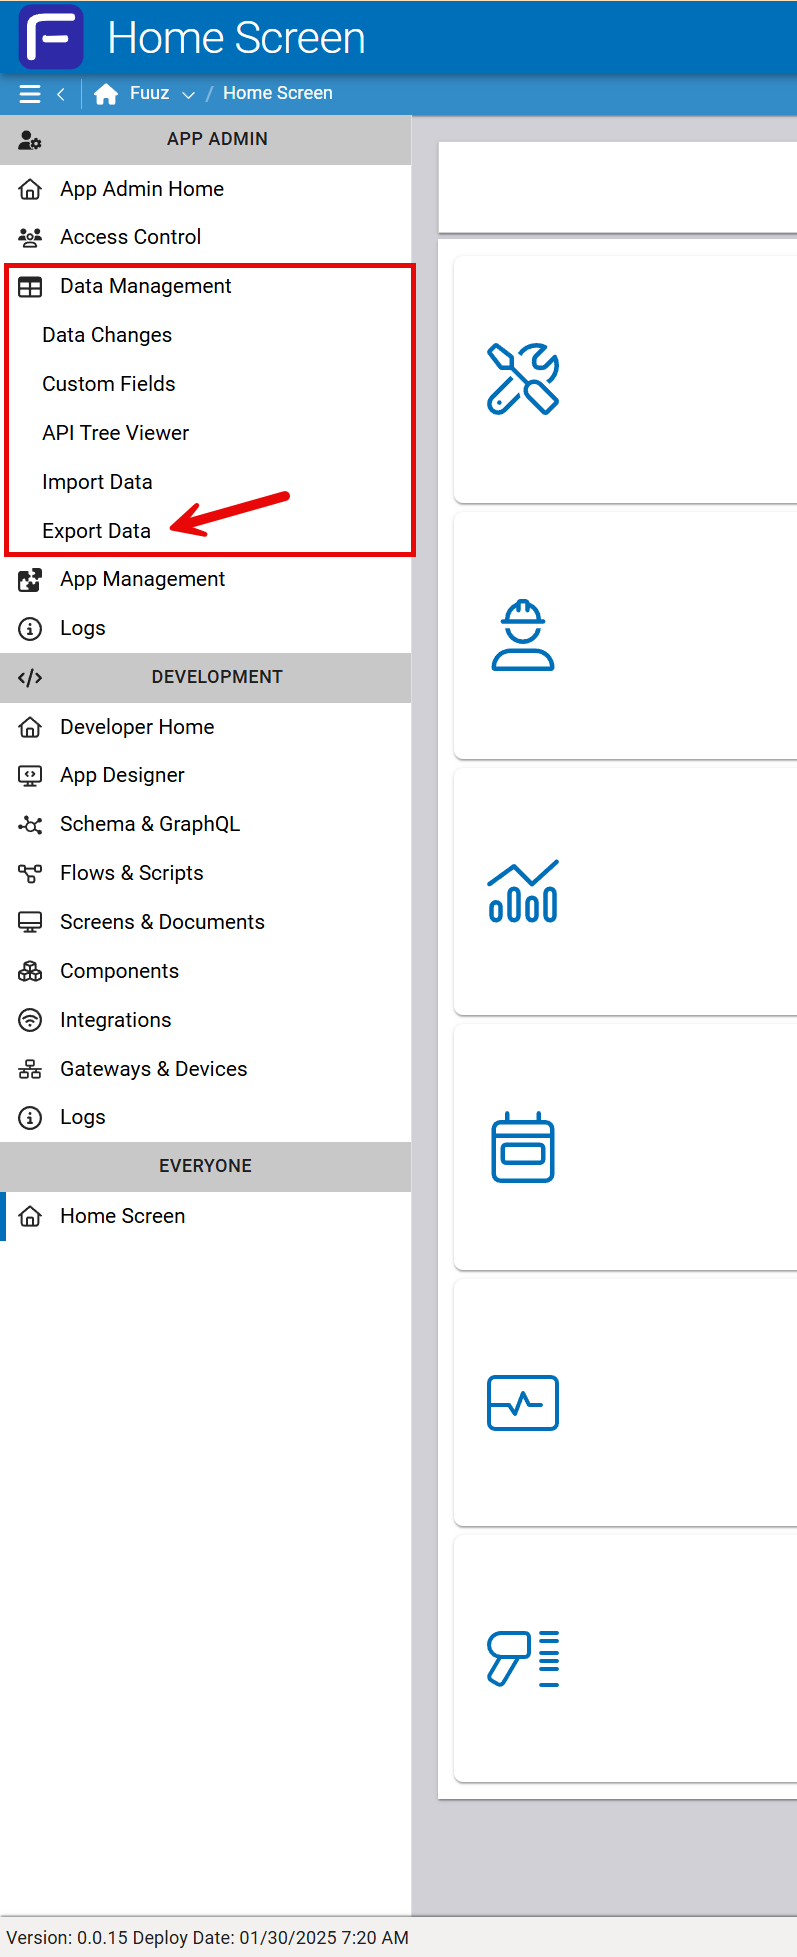
Open the Export Data screen from the Data Management menu.
Administrators have this option available to them within their Access Type Menu on the left side of the page:
UI Layout
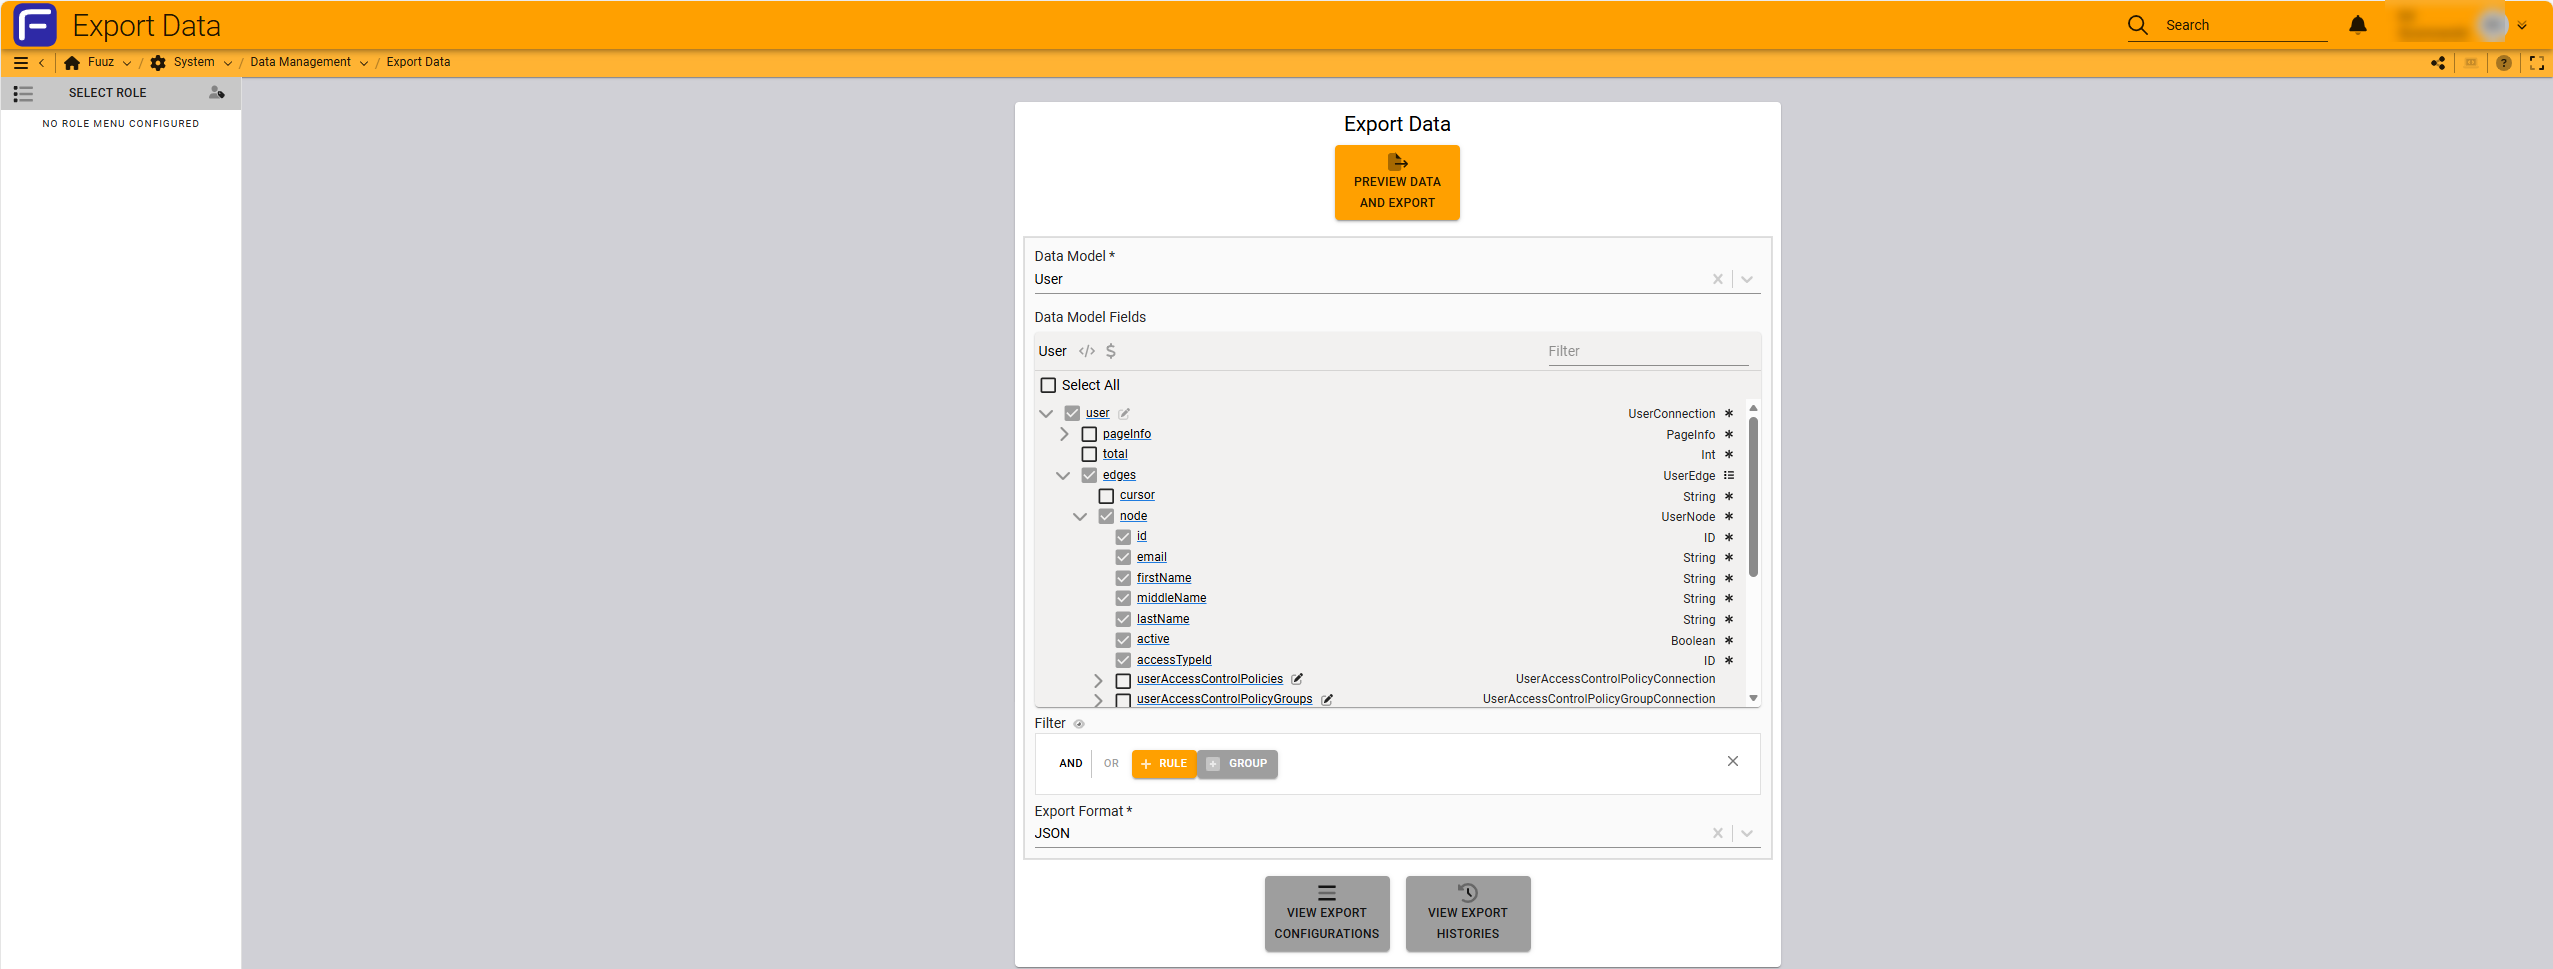
The Export Data screen uses a three-panel layout:
- Left Panel: Export Configuration Table
- Middle Panel: Export Configuration Form
- Right Panel: Preview panel (hidden until triggered)
Export Configuration Table
Displays all configurations with key details and five action buttons:
- Run Configuration: Starts export and creates a new Export History record.
- Edit Configuration: Opens form for updates.
- Copy Configuration: Creates a new configuration based on an existing one.
- Create Preview: Shows estimated row count and first 50 records.
- Delete Configuration: Prompts confirmation before removal.
The Label field links to the Export History Table, and the Last Run field links to the Export History Form.

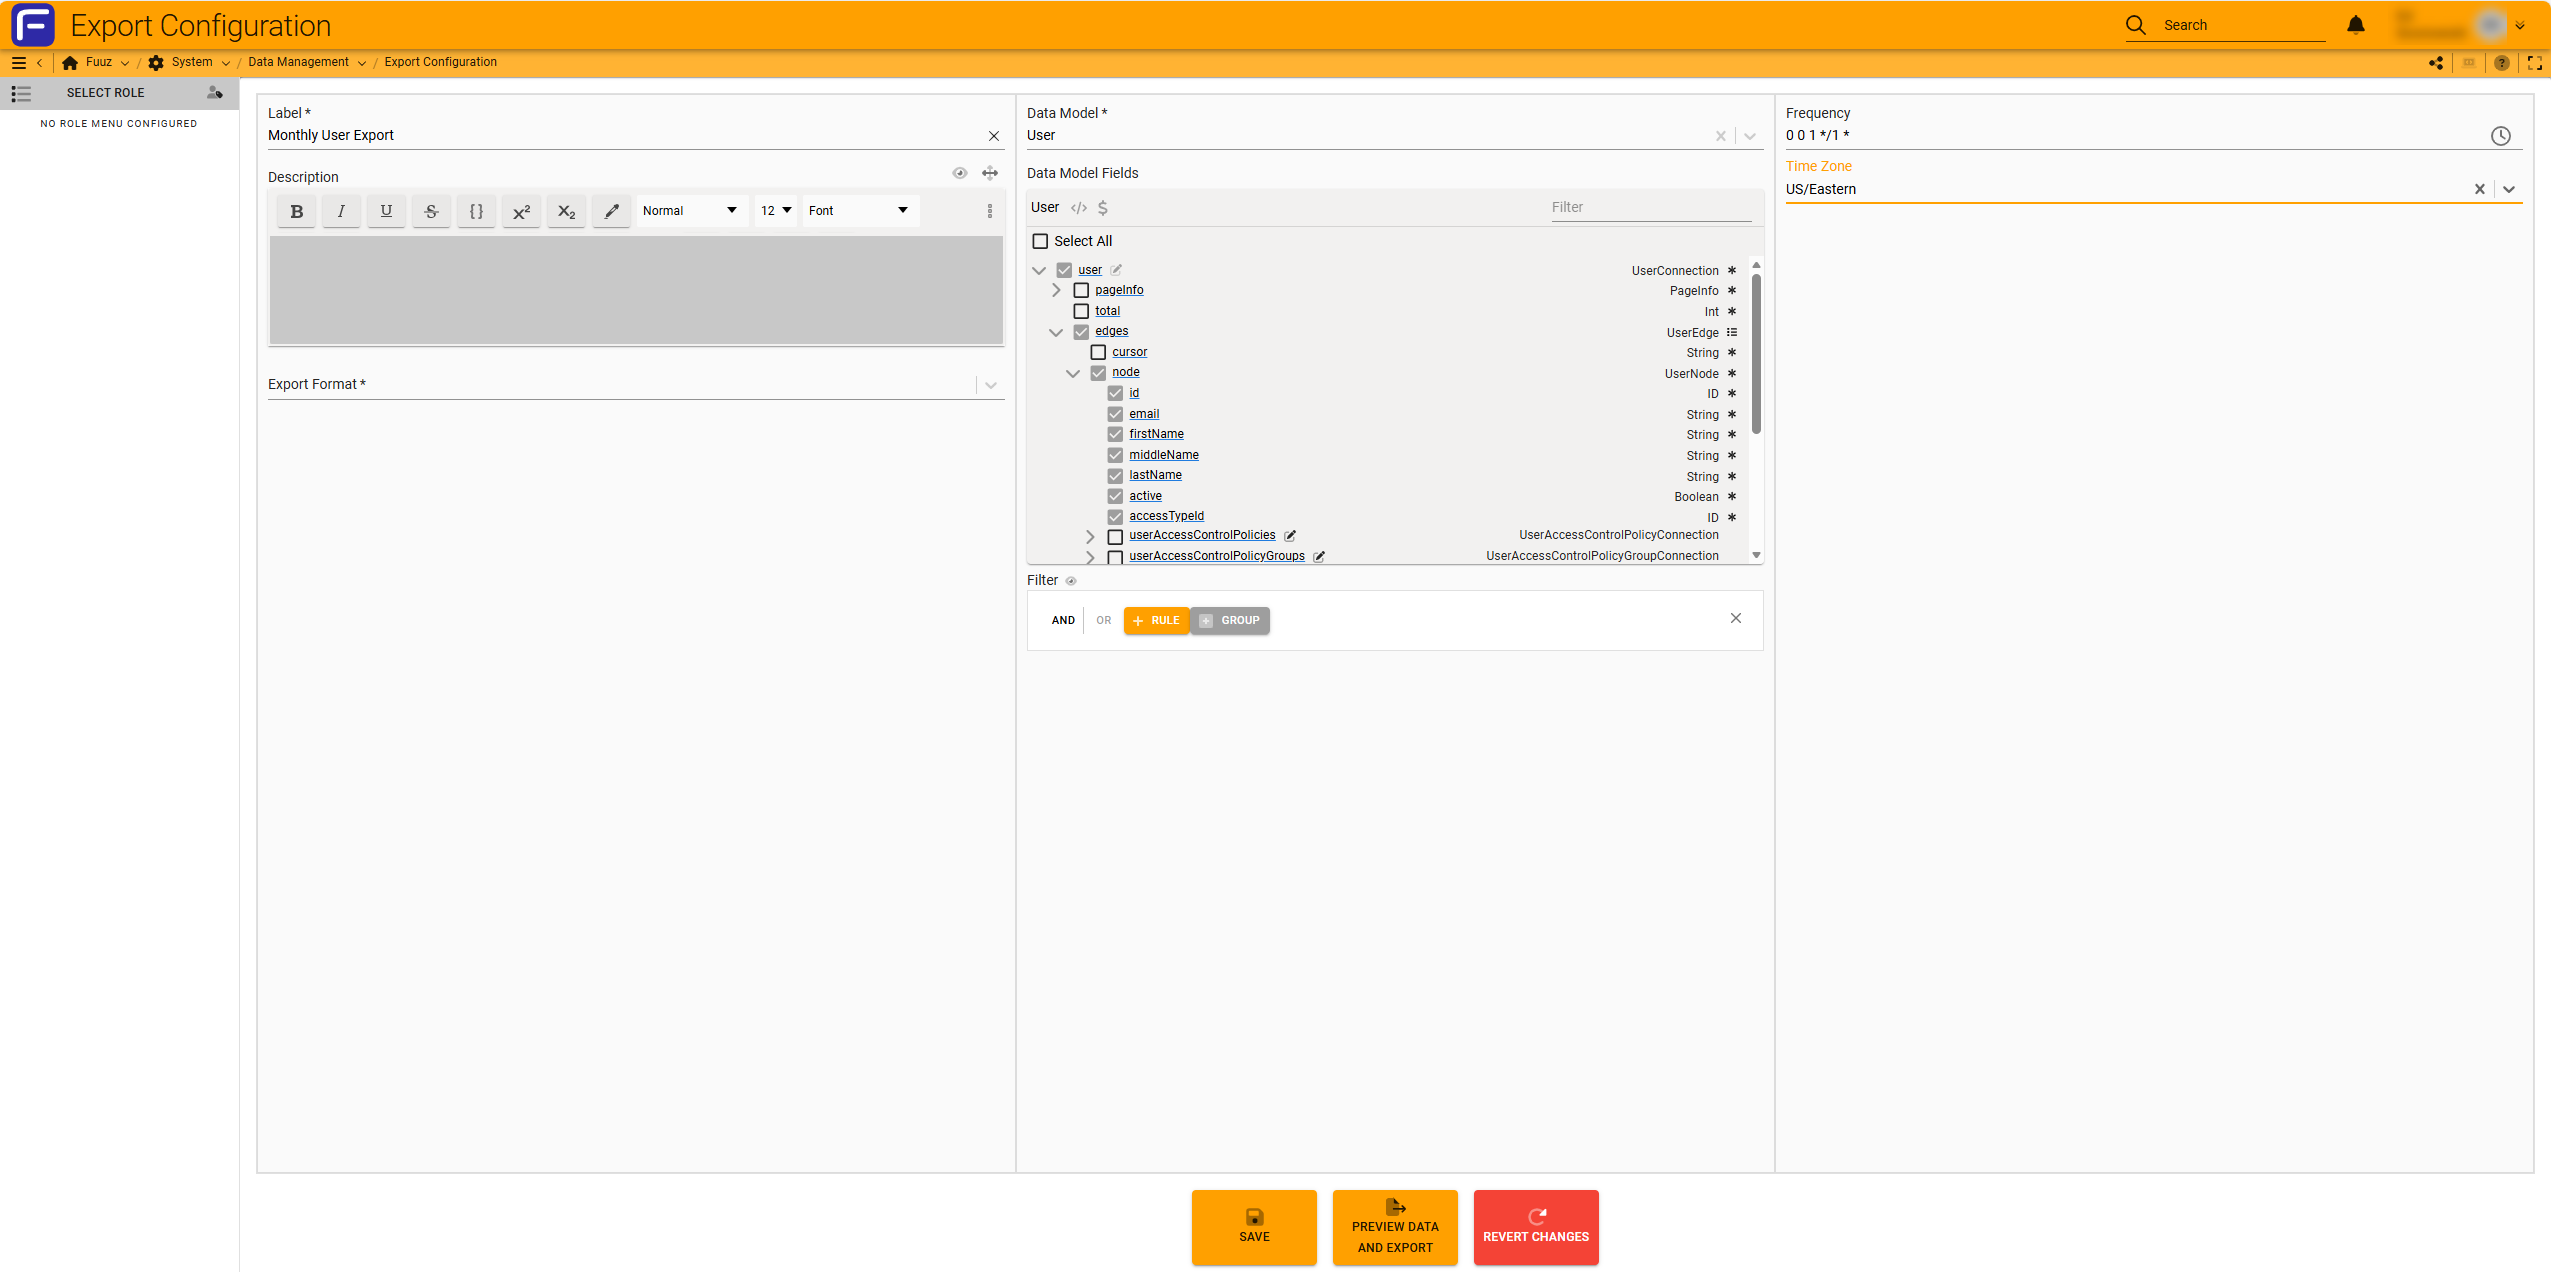
Export Configuration Form
Allows you to create, edit, update, and run Export Configurations. Key features:
- Fill in required fields and click Save or Save and Run.
- Select a data model before configuring query fields and filters.
- Use the Clear button to reset the form.

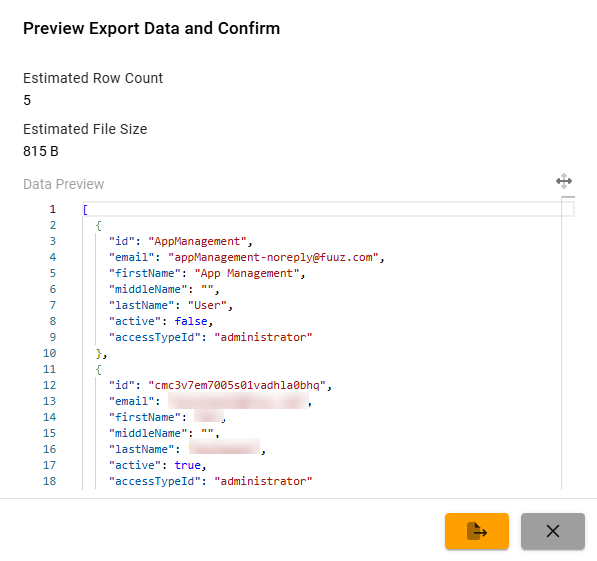
Preview Panel
Appears when clicking Copy, Edit, or Preview buttons. Displays:
- Estimated Row Count: Total records found.
- Data Preview: First 50 records in selected format.
These fields also appear on the Export History Form.
Export History Table
Lists all previous and current exports, including who ran them and when. Actions include:
- Retry: Re-run an export from history.
- Create Export Configuration: Available if the export was ad hoc.

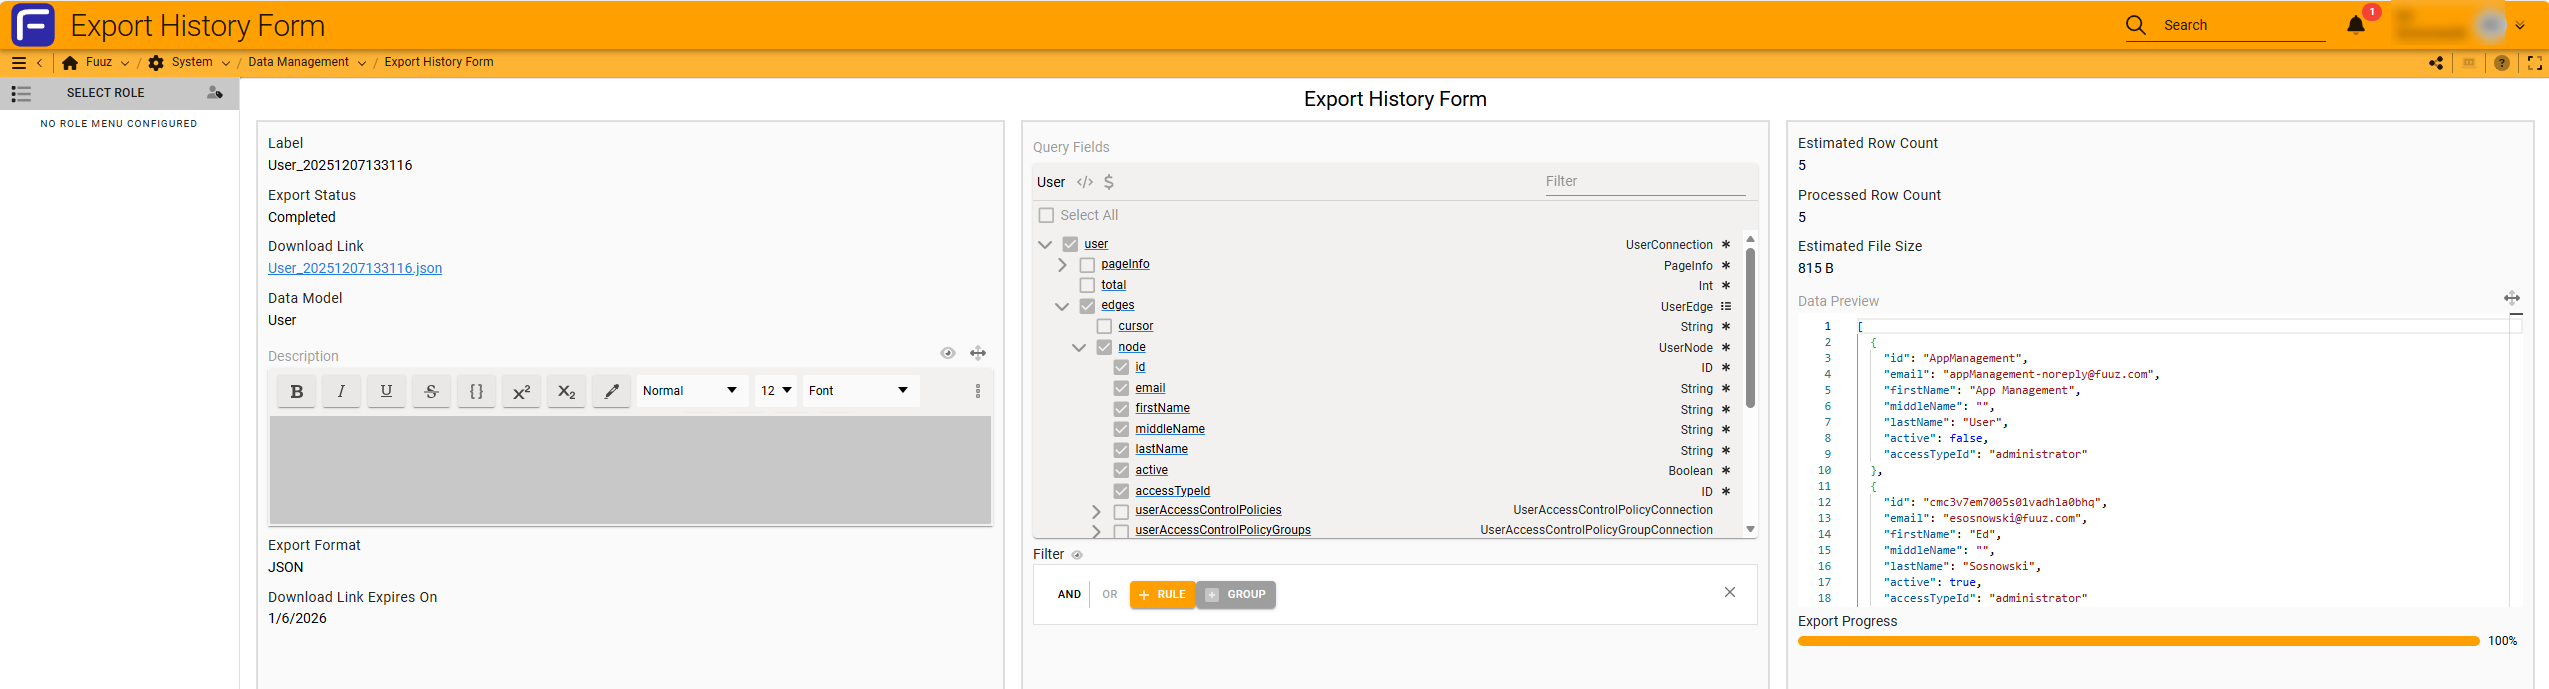
Export History Form
Displays details of an export, including:
- Execution time and label
- Status: Pending, Running, Completed, Errored
- Download Link and expiration date
- Processed Row Count and Estimated File Size
- Preview of exported data
Tip: Download links expire after 30 days, but history records remain for auditing.
Best Practices
- Use Export Configurations for recurring exports.
- Always preview data before exporting.
- Schedule exports during off-peak hours for large datasets.
- Monitor Export History for status and troubleshooting.
Revision History
| Version | Date | Editor | Description |
|---|---|---|---|
| 1.0 | 2025-12-23 | Fuuz Documentation Team | Initial Release with enhancements |
See Also
Related Articles
Data Change History
Article Type: How-To / Reference Audience: Application Administrators, Developers, Compliance Officers Module: Fuuz Platform - Data Management Applies to Versions: 2024.12+ 1. Overview Data Change History provides comprehensive field-level audit ...Data Management Overview
Article Type: Concept Audience: Application Administrators, Enterprise Administrators Module: Fuuz Platform - Data Management Applies to Versions: 2024.12+ 1. Overview Data Management provides Application Administrators and Enterprise Administrators ...Import Data
Article Type: Configuration / How-To Audience: App Admins, Application Designers, Partners Module: Data Management Applies to Versions: All Versions Estimated Time: 15-30 minutes per data model 1. Overview The Import Data feature enables bulk loading ...App Management Overview
Article Type: Concept Audience: App Administrators (New), Application Designers, Partners Module: App Management Applies to Versions: All Versions 1. Overview App Management provides centralized configuration and operational control for Fuuz ...API Tree Browser
Article Type: Concept Audience: App Admins, Developers, Power Users Module: Data Management Applies to Versions: All Versions 1. Overview The API Tree Browser is a powerful visualization tool that provides real-time access to data stored in both ...