Getting Started With Visual Policy Editor
Article Type: Admin Guide Audience: App Admins Module: Admin Options
This article provides the steps and resources to support the task of using the visual policy editor. The visual policy editor makes it easy to create and modify access control policies without requiring written policies in JSON.
Policy Concepts
A policy is a list of statements. Each statement in a policy has an effect, a list of actions and resources, and an optional rule.
- Effect: Allow or deny. Security is always deny by default; explicit deny allows selective blacklisting.
- Actions: What the statement allows or denies performing on the resources (e.g. query, delete, execute flow).
- Resources: What the statement allows or denies performing the actions on (e.g. a model, field, or flow).
Actions and resources allow * to affect all child actions/resources. Example resource from the Web Frontend Access Control Policy:
graphql:system:accessControl:currentUser:*
| Segment | Meaning |
|---|---|
graphql |
Specifies that this is being pulled from the main data API |
system |
The module group |
accessControl |
The module |
currentUser |
The model, which is similar to a table |
* |
Individual fields or columns can be listed if desired; the star * means all columns will be accessible |
Rules: Additional conditional logic evaluated to determine if the statement should apply to the request. There are several types of rules supported:
- rule: JSONata expression that receives information about the request in the payload (exactly what depends on the action) and returns
trueif the statement should apply. - ipInCidrList: A list of IPv4 or IPv6 addresses or CIDR ranges; when the request originates from one of the listed addresses, the statement is applied.
- ipNotInCidrList: A list of IPv4 or IPv6 addresses or CIDR ranges; when the request does not originate from one of the listed addresses, the statement is applied.
Note: The visual editor does not currently support rules. To add a rule, make changes in the JSON editor.
Supported Policy Actions & Resources
The following is a full list of supported policy actions and resources, grouped by base.
GraphQL
GraphQL policy statements affect requests to the Application and System APIs, which are the primary APIs for data retrieval and modification.
Actions
graphql:query- Read data from application or system APIsgraphql:create- Create data in application or system APIsgraphql:update- Update data in application or system APIsgraphql:delete- Delete data in application or system APIsgraphql:mutate- Execute custom mutations in application or system APIs, examples:uploadFile,changeCurrentUserPassword
Resources
graphql:{moduleGroup}:{module}:{type}:{field}
Orchestration
Orchestration policy statements affect the Orchestration service, responsible for running Backend data flows.
Actions
orchestration:executeFlow- Execute a data flow
Resources
orchestration:dataFlow:{flowId}
Integration
Integration policy statements affect the Integration service, responsible for connection to external systems.
Actions
integration:executeConnector- Execute an integration connector
Resources
integration:connector:{connectorId}
Websocket
Websocket policy statements affect requests to the Websocket-based Subscription API.
Actions
websocket:publish- Publish messages to topics through a Subscription service Websocket connectionwebsocket:subscribe- Subscribe to messages through a Subscription service Websocket connection
Resources
websocket:topic:{topicName}- The name of the topic to publish or subscribe to, with periods replaced with colons (e.g.test.namebecomestest:name).websocket:dataChange:{service}:{model}:{operation}- The data change event to subscribe to.websocket:dataChangeNotification:{service}:{model}:{operation}- The data change notification event to subscribe to.websocket:deviceSubscription:{deviceId}:{subscriptionId}- The device subscription events to subscribe to.websocket:deviceGateway:{deviceGatewayId}:{functionId}:{requestId}:{request|response}- The Edge Gateway function event to publish or subscribe to.websocket:device:{deviceId}:{functionId}:{requestId}:{request|response}- The Edge Gateway device function event to publish or subscribe to.
Data Change vs. Data Change Notification Events
- Data Change events are published when a model data change occurs. These events contain the data content of the changed model. Consequently, these events should be restricted to prevent accidental information disclosure.
- Data Change Notification events are published when a model data change occurs. These events only contain the name of the model that changed. These events do not contain additional information about the information change.
Use the data change notification event if you need to know which models changed. Use the data change event if you need the content of the data change.
Resource Wildcards
Websocket resources support two wildcard variants:
- Mid-path wildcards (
*): Match any characters in the segment where the wildcard is present. Example:websocket:dataChangeNotification:application:*:creategrants access to thecreatedata change notifications of allapplicationservice models. - End-path wildcards (
#): Match any characters and segments following the#wildcard. Example:websocket:dataChangeNotification:system:#grants access to the data change events of all operations and models from thesystemservice.
Screen
Screen policy statements affect the behavior of the Fuuz UI, but do not affect any API requests.
Actions
screen:navigate- Access a screen through the Fuuz UI.
Resources
screen:{moduleGroup}:{module}:{path}
Create a New Policy
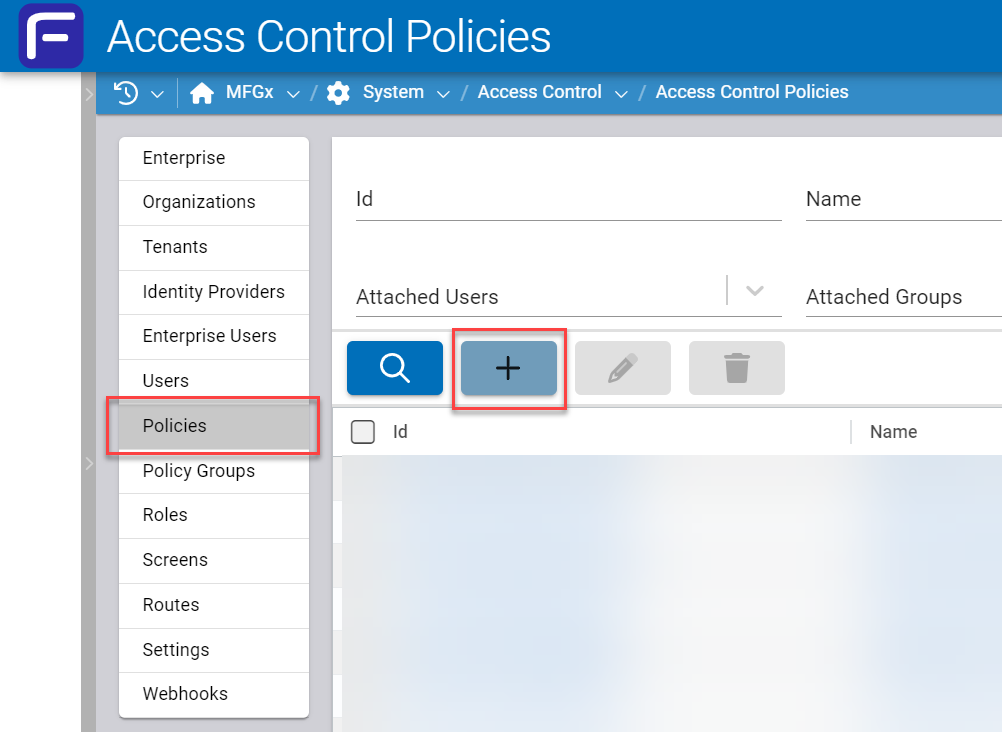
Go to the Access Control Policies list.
Click the pale blue + button to create a new policy. Alternately, select a pre-existing policy to edit or modify.
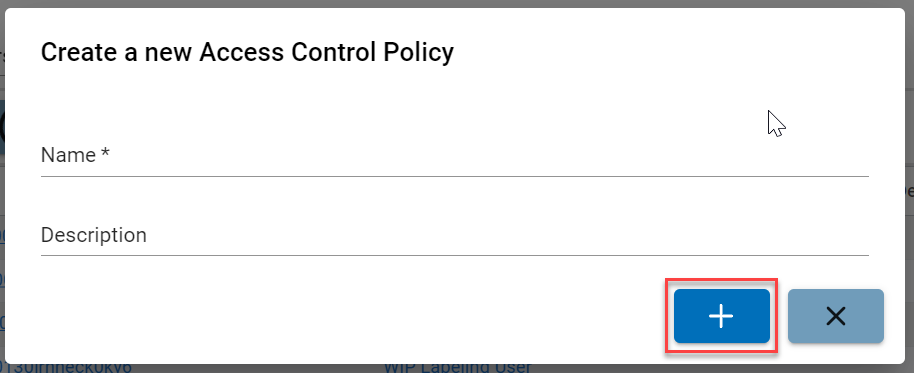
Wait for the window to appear, then type in a Name and a Description, and click the blue + button.
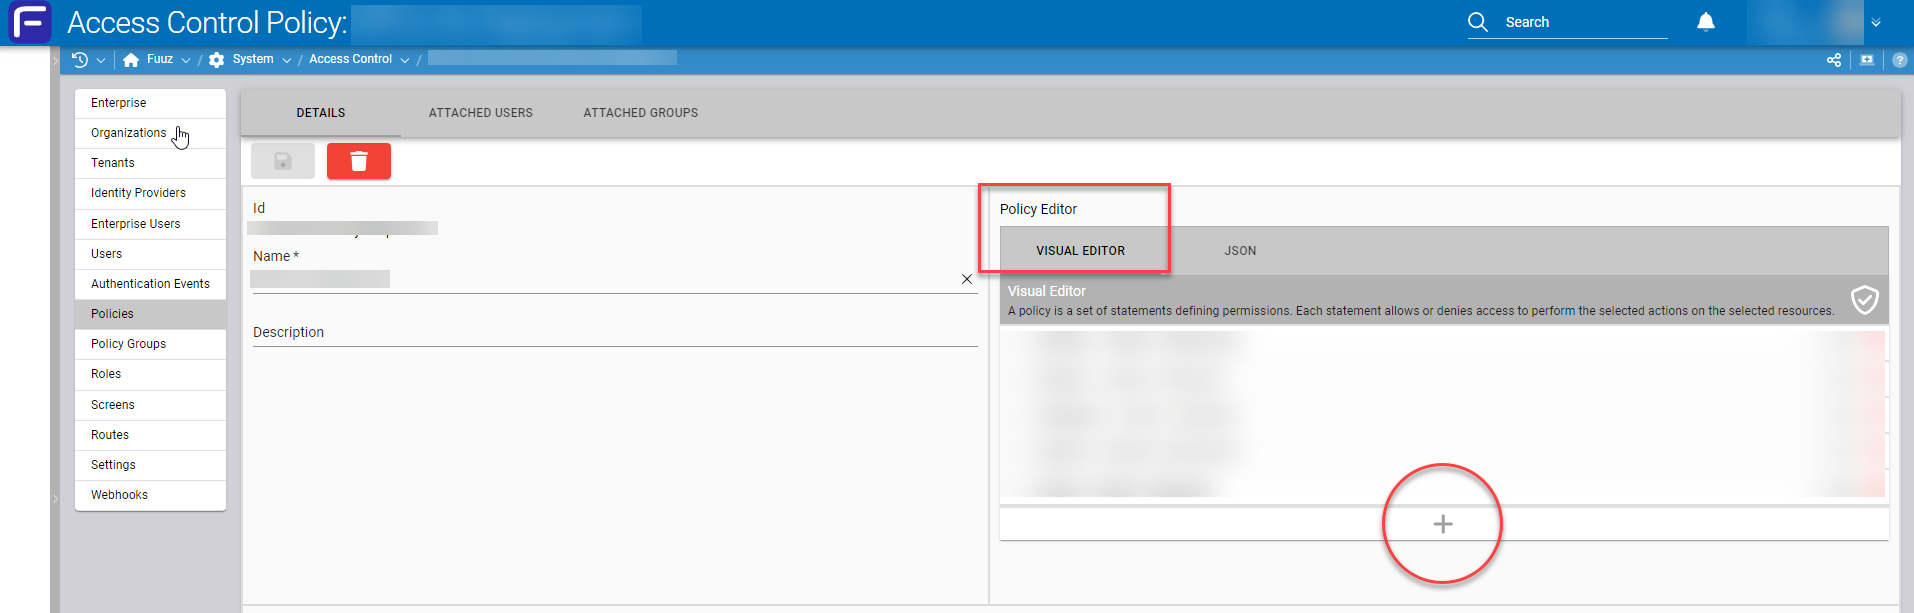
Wait for the Details page to open, then click the blue + icon to add new statements. Alternately, modify existing statements in the Visual Editor tab of the Policy Editor.
Select a base:
- GraphQL (all the resources and action permissions except data flows and connectors)
- Orchestration (executing data flows permissions)
- Integration (executing connectors permissions)
Wait for the actions and resources for that base to be displayed in a checkbox tree format.
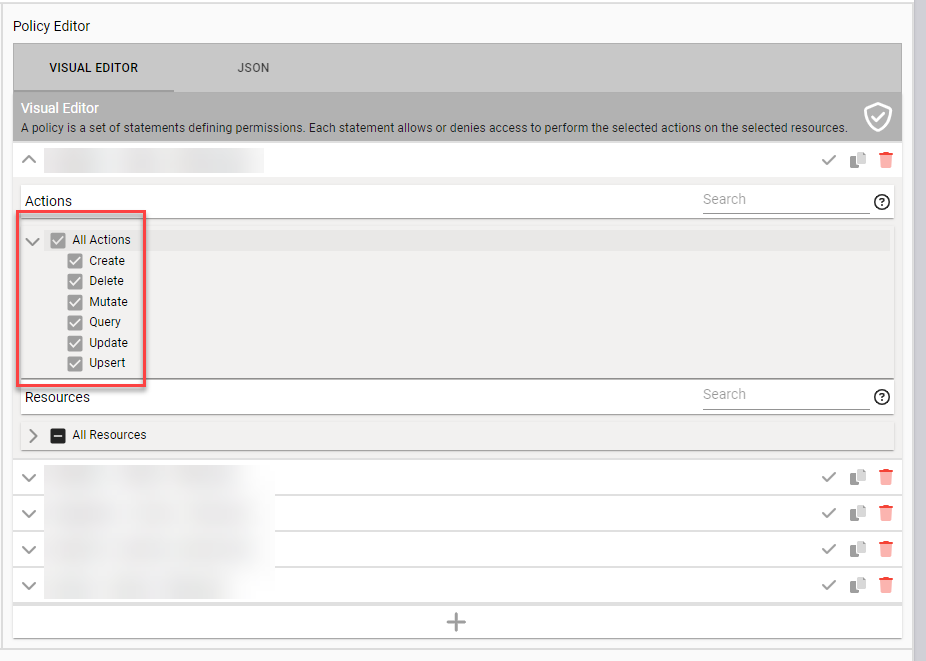
Use the left arrow icon to expand the actions, or use the search bar to view the actions. Check the box or click on the action to select the actions necessary for the statement.
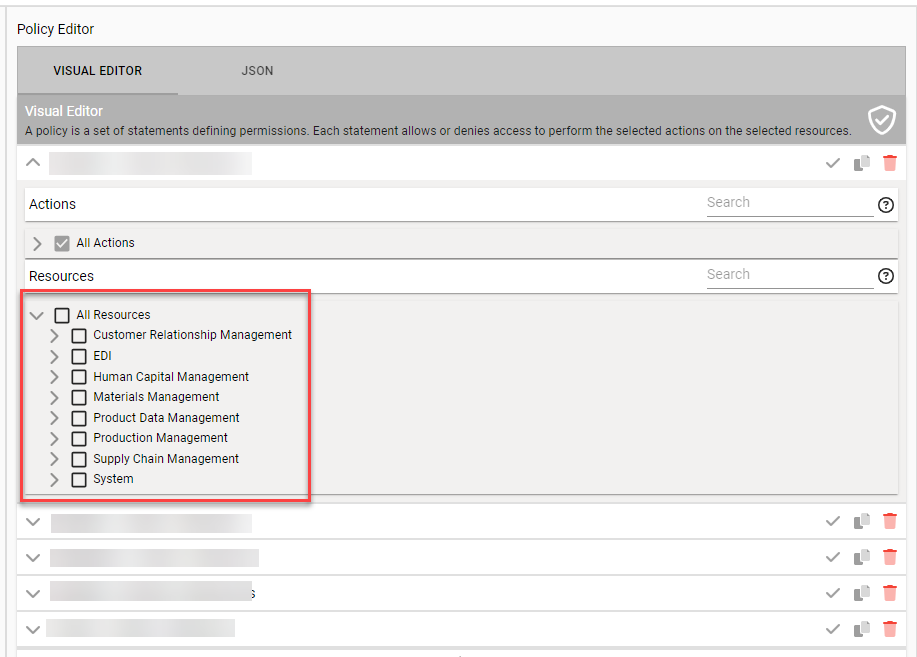
Select the resources necessary for the statement.
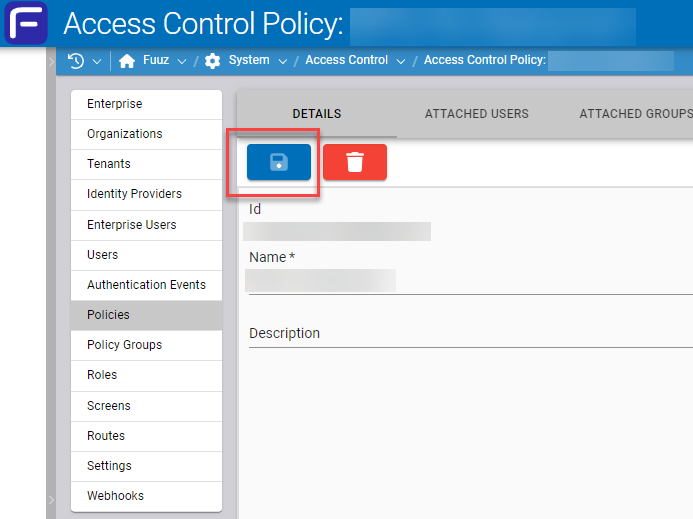
Repeat the steps as necessary, then click the blue save button.
Important: It is necessary to select at least one action and one resource before saving, otherwise the data will be lost.
If the policy is saved successfully, the save button (top, left) will be grayed out, and there will be a confirmation message.
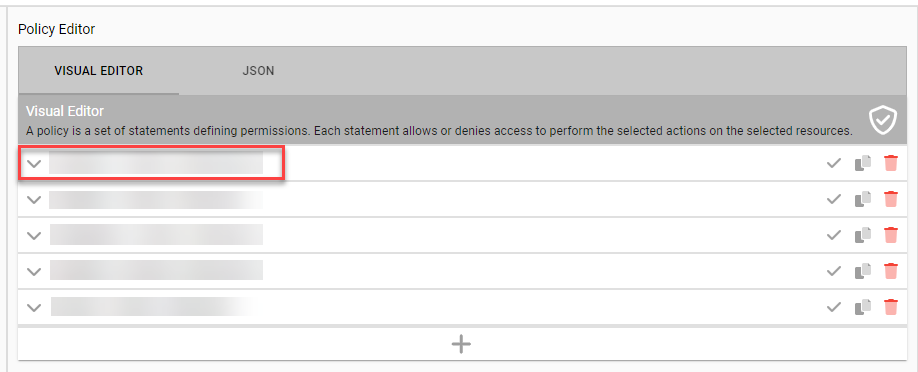
Create, Edit, Modify, and Delete Statements
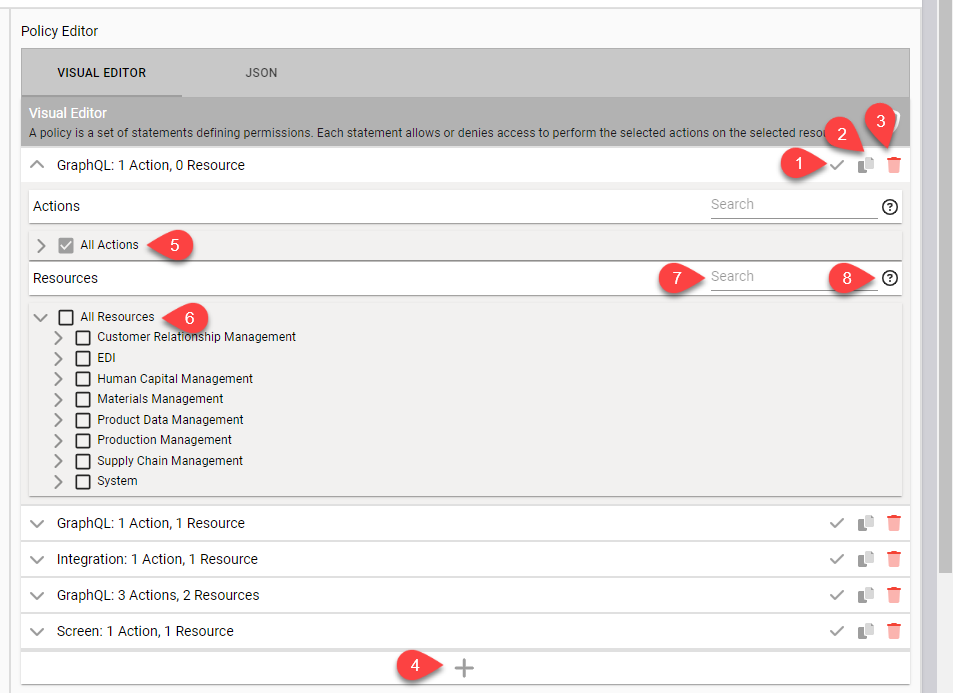
- Select the icon to Allow Permission or Deny Permission (the Allow Permissions state is shown).
- Select the icon to Copy or clone that statement.
- Select the icon to Delete that statement.
- Select the + icon to Add a new statement.
- Use the All Actions box to select all the items in the tree.
- Use the All Resources box to identify the resources in the tree (an intermediate check mark means only some items are selected in the tree).
- Use the Search bar to search for a particular action or resource.
- Use the ? icon to show a description of actions and resources present.
Change the Permission State
Change the permission by clicking on the icon to Allow Permission or Deny Permission (the Allow Permission state is shown).

See Also
Related Articles
Policies & Policy Groups
Policies & Policy Groups Article Type: Concept Audience: Application Administrators, Security Architects, Partners, Solution Engineers Module: Fuuz Platform - Access Control Applies to Versions: 2024.12+ 1. Overview Policy Groups and Policies form ...Roles
Roles Article Type: Concept Audience: Application Administrators, Solution Architects, Partners Module: Fuuz Platform - Access Control Applies to Versions: 2024.12+ 1. Overview Roles are the foundation of role-based access control (RBAC) in Fuuz, ...App Management Overview
Article Type: Concept Audience: App Administrators (New), Application Designers, Partners Module: App Management Applies to Versions: All Versions 1. Overview App Management provides centralized configuration and operational control for Fuuz ...Flow Schedules
Flow Schedules Article Type: Concept Audience: App Administrators, Application Designers, Developers Module: App Management Applies to Versions: All Versions 1. Overview Flow Schedules provide automated time-based execution of Data Flows using ...Access Control
Article Type: Concept Audience: Application Administrators, Enterprise Administrators, Partners Module: Fuuz Platform - Access Control Applies to Versions: 2024.12+ 1. Overview Access Control in Fuuz provides a comprehensive governance framework for ...